Contents
First, make sure you really want to. macOS’s screen saver system is absurdly buggy and broken. It’s frustrating to work with and very difficult to make work right.
If you’re determined, read on.
Screen savers are basically just applications. Same bundle format and structure, just with a “saver” extension instead of “app”.
Setting up the Xcode project
In Xcode, create a new project using the Screen Saver template.
Delete the Objective-C code & header files it creates by default (unless, I suppose, you want to write your screen saver in Objective-C – woo, retro! 😆).
You need to import the ScreenSaver module (framework), subclass ScreenSaverView, and implement a couple of method overrides. Here’s the basic skeleton:
import ScreenSaver

class MyScreenSaver: ScreenSaverView {
    override init?(frame: NSRect, isPreview: Bool) {
        super.init(frame: frame, isPreview: isPreview)
        setup()
    }

    required init?(coder: NSCoder) {
        super.init(coder: coder)
        setup()
    }

    private func setup() {
        // TODO
    }

    override func startAnimation() {
        super.startAnimation()

        // TODO
    }

    override func animateOneFrame() {  // Optional.
        // TODO
    }

    override func stopAnimation() { //  Only for the live preview in System Settings.
        // TODO

        super.stopAnimation()
    }

    override var hasConfigureSheet: Bool {
        true
    }

    private var configureSheetController: ConfigureSheetController?

    override var configureSheet: NSWindow? {
        configureSheetController = ConfigureSheetController(windowNibName: "ConfigureSheet")
        return configureSheetController?.window
    }
}

class ConfigureSheetController: NSWindowController {
    override var windowNibName: NSNib.Name? {
        return "ConfigureSheet"
    }

    override func windowDidLoad() {
        super.windowDidLoad()

        // TODO
    }

    @IBAction func okButtonClicked(_ sender: NSButton) {
        // TODO

        window!.sheetParent!.endSheet(window!, returnCode: .OK)
    }
}Providing a preferences sheet
If you don’t have any options to configure, you can of course change hasConfigureSheet to return false. Otherwise, you’ll need to create a “ConfigureSheet” xib file with a window in it containing your screen saver’s settings. You can use UserDefaults to save your settings (if you wish), same as any other app. And you’ll need to add an “Okay” or “Save” or similar button to dismiss the sheet.
Getting ready to render
The key methods to implement are setup, with any initial configuration you wish to do (e.g. allocate image or video views, load assets, set up the view hierarchy, etc).
ScreenSaverView is an NSView subclass with a flat black background by default, onto which you can add subviews. Typically for a screen saver you have a very simple view hierarchy – often just a single view or CoreAnimation layer that you’re rendering to – but you can load a xib and insert elements from it into the view if you like.
☝️ It’s wise to not render anything in setup, which includes accidentally – you might need to set views to hidden, layers to zero opacity, etc. This is basically because there can be an arbitrarily long gap between setup and startAnimation calls, and it’s often weird to render something initially, potentially not animate for a noticeable length of time, and then start actually working properly.
Alternatively, you might insert a placeholder image or text, e.g. “Loading…”, if you really want. But in my opinion it’s more graceful to just let the initial black screen stand for a moment.
Rendering
startAnimation is where you should actually start displaying things. e.g. if you’re using an AVPlayer, this is where you actually start it playing (after making it visible, e.g. setting its opacity to 1).
animateOneFrame is optional, and is only called if you set the animationTimeInterval property (on self) to a finite, non-zero value in setup (in which case it’ll be called at intervals at least that long – it might not be called as often as you desire if previous calls overrun or there’s other bottlenecks in the screen saver framework). It’s essentially just a minor convenience vs having to explicitly set up an NSTimer.
Given how buggy Apple’s screen saver framework is, I suggest not relying on animateOneFrame if you can at all avoid it. Even if that means setting up your own timer. That way when they likely break that too in some future macOS release, your screen saver won’t necessarily break as well.
Bonus topic: fading in
Unless your screen saver inherently appears gently (e.g. starts rendering with a flat black view and only slowly adds to it), it’s nice to add a fade-in. You can do that using CoreAnimation on the view’s layer:
override func startAnimation() {
    // Other code…

    if let layer {
        layer.opacity = 0.0  // Should already be zero from `setup`, but just to be sure.

        let fadeAnimation = CABasicAnimation(keyPath: "opacity")
        fadeAnimation.fromValue = 0.0
        fadeAnimation.toValue = 1.0
        fadeAnimation.duration = 5  // Seconds.

        // Essential settings to keep the final state
        fadeAnimation.fillMode = .forwards
        fadeAnimation.isRemovedOnCompletion = false

        layer.add(fadeAnimation, forKey: "fadeAnimation")
    }

    // Other code…
}Note that you cannot implement a fade-out when the screen saver exits, because macOS hides your screen saver immediately. Plus, the user might not want a fade-out as they may be in a rush to do something on their computer.
Previewing
You can determine if you’re running for real or only the preview via the isPreview property (on self). Many screen savers don’t care, but particularly if you save any persistent state, you might want to avoid doing that during preview. For example, in a screen saver which plays a looping video and resumes where it last left off, you probably don’t want the preview to quietly advance the video.
Stopping
stopAnimation is only used for the live preview thumbnail shown in the Screen Saver System Settings pane. It is never called in normal operation of the screen saver (contrary to what Apple’s documentation says – Apple broke that in macOS Sonoma and later).
And that leads to the first path off the official track. When the screen saver is dismissed by the user, nothing in Apple’s framework code does anything. Your view continues to exist, animateOneFrame continues getting called, etc. Your screen saver just runs in the background, its output not visible, but wasting CPU cycles and RAM. Worse, if you have sound, that keeps playing.
🙏 A big thanks to cwizou via StackOverflow for documenting the solution, which I’ve summarised below.
To get around that, you need to register for the com.apple.screensaver.willstop notification, in setup, like so:
  private func setup() {
    DistributedNotificationCenter.default.addObserver(self,
                                                      selector: #selector(willStop(_:)),
                                                      name: Notification.Name("com.apple.screensaver.willstop"),
                                                      object: nil)
}

@objc func willStop(_ notification: Notification) {
    stopAnimation()
}Note that you still need stopAnimation specifically, because in the live preview in System Settings you won’t receive that com.apple.screensaver.willstop notification (from the system’s point of view, the screen saver isn’t running – it’s merely previewing).
Handling resumption
Here’s the second big bug in Apple’s screen saver framework – every time the screen saver starts, your ScreenSaverView subclass is created again. But the old one doesn’t go anywhere. So now you have two copies running simultaneously, which is at the very least wasteful, and can easily lead to gnarly bugs and weird behaviour (e.g. if both are playing sound, or both modify persistent state).
There are essentially two ways to handle this:
- Kill your own process every time you stop animating.
- Manually kill or lame-duck older views when a new one is initialised.
Note that you cannot simply check at MyScreenSaver initialisation time if an instance already exists and if so fail initialisation (as is prescribed by this otherwise excellent write-up of this problem), because if you don’t correctly initialise you’ll sometimes end up with nothing rendering or running (the screen saver framework appears to not gracefully handle initialisation failures).
Killing your own process can work but has some perils:
- If you kill your process in
stopAnimationthe screen will flash black momentarily before actually exiting screen saver mode, which is visually annoying. - If the screen saver is restarted rapidly after being interrupted, sometimes you’ll end up with nothing but a black screen (with no screen saver running). There’s evidently some race condition in Apple’s screen saver system between screen saver processes exiting and being [re]launched.
So I recommend not taking that approach. Instead, you can lame-duck the old view instances. They’ll stick around, which is a little wasteful of RAM, but as long as they’re not rendering or otherwise doing anything, they’re benign.
There are various ways to implement that, but one of the simpler ones is simply a notification between instances:
static let NewInstanceNotification = "com.myapp.MyScreenSaver.NewInstance";

var lameDuck = false

private func setup() {
    // Initial setup…

    NotificationCenter.default.post(name: MyScreenSaver.NewInstanceNotification, object: self)

    NotificationCenter.default.addObserver(self,
                                           selector: #selector(neuter(_:)),
                                           name: MyScreenSaver.NewInstanceNotification,
                                           object: nil)

    // Further setup…
}

@objc func neuter(_ notification: Notification) {
    lameDuck = true

    stopAnimation()

    self.removeFromSuperview()

    // TODO: any additional cleanup you can, e.g. release image & video files, throw out transient models and state, etc.

    NotificationCenter.default.removeObserver(self)
    DistributedNotificationCenter.default().removeObserver(self)
}You should check lameDuck at the start of methods like startAnimation or animateOneFrame and exit immediately if it’s set to true. Unfortunately, Apple’s screen saver framework will still call those methods on old instances.
Exiting
Unfortunately Apple’s screen saver system will never terminate your screen saver process. Worse, even if you do nothing yourself, Apple’s screen saver framework code will run in an infinite loop, wasting [a small amount of] CPU time. So it’s not great to leave your screen saver process running indefinitely.
Thus, I implement an idle timeout in my screen savers, to have them exit if they’re not active for a while. This can be done like:
@MainActor var idleTimeoutWorkItem: DispatchWorkItem? = nil

override func startAnimation() {
    // Other code…

    DispatchQueue.main.async {
        if let idleTimeoutWorkItem {
            idleTimeoutWorkItem.cancel()
        }

        idleTimeoutWorkItem = nil
    }

    // Other code…
}

override func stopAnimation() {
    // Other code…

    if !lameDuck {
        DispatchQueue.main.async {
            idleTimeoutWorkItem?.cancel()

            let workItem = DispatchWorkItem(block: {
                NSApplication.shared.terminate(nil)
            })

            idleTimeoutWorkItem = workItem

            DispatchQueue.main.asyncAfter(wallDeadline: .now() + 65, execute: workItem)
        }
    }

    // Other code…
}I chose the 65 second timeout somewhat arbitrarily. I figure there’s a reasonable chance a user will unlock their screen to do something quick, then engage the screen saver again – all in the less than a minute – and the cost of idling in the background for an extra minute is small, compared to the cost of relaunching the whole app and reinitialising your renderer.
I added five extra seconds to reduce the probability of aligning with some one-minute timer (e.g. a spurious wake with the screen saver set to start automatically after one minute of no user activity).
You can adjust it however you like.
Testing your screen saver
Double-clicking the built product (your “.saver” app) will prompt the user to install it, replacing an old version if necessary. So that works, though I find it faster to just manually copy the “.saver” app to ~/Library/Screen Savers. Just make sure to kill the existing legacyScreenSaver process, if necessary.
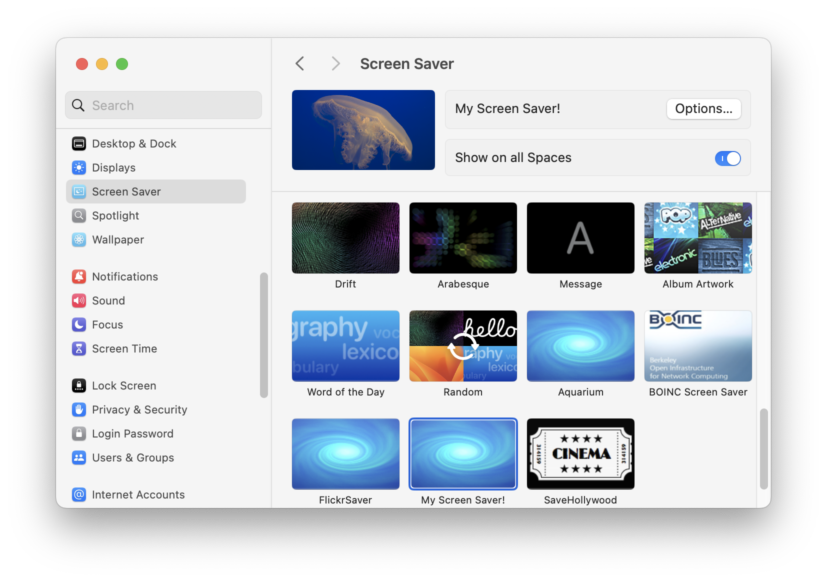
You can test it in System Settings, in the Screen Saver pane. That’s the only place you can test the live preview part.
But otherwise, I found it easiest to just set one of the screen hot corners to start the screen saver, and use that immediately after copying the new “.saver” file into place.
Just be aware that the first time any new copy of the screen saver runs, macOS runs a verification on the bundle, which can take a while if your screen saver is non-trivial in size (e.g. if you bundle large image or video resources). You’ll get a black screen with nothing happening, after invoking the screen saver, while that verification is running.
Distributing your screen saver
You don’t have to sign your screen saver, necessarily, but users will get some annoying error dialogs trying to run it, and will have to fiddle with things in System Settings – or, if they’re on a corporate Mac, they might not be able to run it at all. So it’s preferable to just sign it.
Xcode doesn’t support signing screen savers like it does for plain app targets and the like. So you have to do it manually via the command line, on the built product (your “.saver” app). Thankfully it’s just two commands (once you have the appropriate stuff set up in your developer account – note that you will need a paid Apple Developer account, at $99/year).
Follow the instructions here, but note that they’re missing the final step:
xcrun stapler staple -v MyScreenSaver.saver
Note that you run it against the screen saver itself, not the zip file. The zip file’s just a hack to get Apple’s notary tool to accept the submission. It’s the screen saver bundle itself that’s actually notarised and signed.
⚠️ notarytool uploads your screen saver to Apple. Be sure it doesn’t contain anything you’re not happy being potentially public (Apple will presumably try to keep your uploads private to Apple, and might not intentionally store them forever, but I wouldn’t bet my life on their confidentiality).
Conclusion
That’s “it” in a superficial sense – if you’ve followed all this so far, you have a roughly working screen saver.
But there are a lot more bugs and nuances thereof that may afflict you, depending on what you’re doing in your screen saver. So good luck. 😣
Addendum: SaveHollywood
I found that looking at existing open source screen savers was partially helpful, but also sometimes misleading. e.g. for my most recent screen saver I basically just play a video in a loop (which should be embarrassingly trivial but took two weeks to get working properly, thanks to the aforementioned bugs in Apple’s frameworks, among many others). In that case I looked at SaveHollywood, a similar screen saver, for aid and ideas.
Unfortunately, SaveHollywood is abandoned and doesn’t work on recent versions of macOS. The way it does some things is archaic and either not the best way or not functional at all.
Nonetheless, it did help with some of the higher-level aspects, above the screen saver machinery itself, like how to use AVPlayer in a screen saver.
So, do check out similar, existing screen savers (and of course just use them directly if they suit your needs!) but beware of obsolete or otherwise incorrect code.
Addendum: What this says about Apple
What really troubles me about the screen saver system is what it says about Apple’s approach to the Mac, software, and their users. Which is sadly just the same thing we’ve been seeing for years now.
Screen savers used to work fine. There was an API established long ago that was lightweight, straight-forward, and effective. All Apple had to do was not break it.
And how they broke it is troubling. Perhaps it was prompted by some otherwise unrelated but well-meaning refactor – pulling screen saver code out into a separate, sandboxed process, perhaps, for improved system security. Fine. But if it’s worth changing it’s worth changing properly. It’s very clear that whomever did the changes either (a) didn’t care that they broke things badly, or (b) didn’t care to check.
It’s that recurring theme of not caring that’s most disappointing in today’s Apple.


Yep. Apple managed to totally break the new “legacyScreenSaver” in Sonoma, again in Sequoia, and again in Tahoe. It’s amazing, because one would assume the “legacy” engine would implement the API as written. Nope!
Through several rounds of group effort, we managed to un-tangle the mess and come up with a ton of workarounds.
One particular fix we came up with is that it’s better to call exit(0) instead of NSApplication.shared.terminate.
Please read the thread here: https://github.com/JohnCoates/Aerial/issues/1396 for the gory details. There are links in that thread to Apple Developer forum posts which are also interesting – at least one Apple employee knows the situation is a mess.
Thanks for the shoutout, however some of the information in that stackoverflow post is outdated, not all events are sent nowadays depending on the version of macOS…
And maybe just to clarify, savers are not apps. Historically, savers were plugins (as in, a bunch of code another app can load, think .dll for the Windows people) for ScreenSaverEngine. Apple however deprecated all plugins a while ago in favor of the (truly) safer app extension format. Except screensavers were left in the dust. So they came up with that magical solution of legacyScreenSaver.appex which tries to emulate the old API but as you’ve seen, fails progressively more and more at each major release of macOS.
So nowadays, a .saver is a plugin to an app extension (legacyScreenSaver.appex) to ScreenSaverEngine. Yay. Apple does have a private api for making appex screensaver, which it sometimes uses (or sometimes it bypasses the legacyScreenSaver requirement, because why not).
I’m pointing this out because of your title on handing resume. In practice, each screen, every time you launch the screensaver (or System Settings) creates an instance of the class in your bundle. As you pointed out, those will remain active (never get stopped or destroyed since Sonoma), and Tahoe makes this worse. System settings will (wrongfully) start 2 instances of your saver if you dare to open the ScreenSaver panel hidden inside Wallpapers. And it will not kill both (nor stop them, and here the stopAnimation trick is not sufficient).
There are tons of other issues regarding killing your own instance, depending on when you do it and various hardware, it will bring black screen issues. It may be safer to have stubs (what you call lameducks) laying around forever. And I didn’t even mention the multi monitor issues where legacyScreenSaver mixes up your screens.
Maintaining a third party macOS screensaver is needlessly impossible at this point, and it’s just a pain. I keep filing radars and try to raise the issue with DTS at every WWDC, and while they all acknowledge this is really bad, nothing ever changes. I try and maintain a minimal swift screensaver template (https://github.com/AerialScreensaver/ScreenSaverMinimal) with the various workarounds, but the not caring as you put it, is truly maddening.
Great timing on finding this article. I was trying to get a screensaver working recently and was getting so frustrated with encountering these issues.
Two things I’ll say:
1. these workarounds are great and I think it would be nice to encapsulate the logic in a community base class that has these fixes bootstrapped and ready to go. Basically a subclass of ScreenSaverView with these hooks in place.
2. I feel like it might be time to also consider abandoning ScreenSaverView entirely because a screen saver is nothing more than a background process that opens a full screen app after an idle timeout. Maybe that’s just the way going forward since Apple doesn’t seem interested in fixing anything.